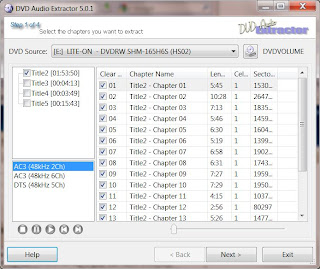
After inserting the disc into my DVD drive, I opened DVD Audio Extractor. Here's the main interface:

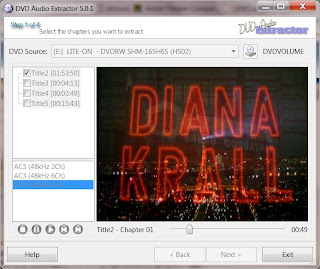
DVD Audio Extractor displays all the title sets and chapters. Usually the main concert tracks will be in the title set with the largest duration. The shorter title sets are usually extras or special clips. In the main window it shows the list of chapters. These are usually the music tracks from the concert. To verify the correct title set and chapters, you can select something and hit the play button. DVD Audio Extractor will play the chapter in the main window and you can watch and listen to the video.

The program also lists all the audio streams for each title set. In this example, you can see both stereo and 6 channel AC3 (Dolby Digital) streams and a 5 channel DTS stream. Sometimes the video will include a higher resolution stereo PCM stream, but that's not the case here. The AC3 and DTS multichannel streams are almost always 16-bit, 48 kHz. Since I'm a bit of an audio purist, I don't normally store lossy encoded audio in my library. I usually rip everything to lossless FLAC or WMA. However, I will make an exception for surround tracks and rip the occasional DTS audio. I prefer DTS over AC3 because it is compressed at a higher bit rate and usually sounds better.
Next, I'll edit the chapter names so they show the name of the songs on the DVD. I just referred to the back cover of the DVD case for the list of songs. This is what it looked like after I edited the chapter names:
 Once you've made these edits, you need to select all the chapters/tracks you want to extract. I also found some bonus material in Title5 and after previewing was able to figure out that it was the rehearsal footage for 3 songs. Since it was also 5ch DTS audio, I decided to include it in my selection. Picking the 'Next' button will take you to the next step. In this window you select the output audio format. You can choose between lossy compression formats like OGG or mp3 and lossless FLAC compression. There's also an option for uncompressed WAV and Direct Stream Demux.
 I was a little confused by the options for 'Channels'. With FLAC (and WAV), I noticed you can choose between mono, stereo and 'All 6 Channels'. However, in the previous screen, the DTS audio stream was listed as DTS (48kHz 5CH). So I thought it would show 5 channels instead of 6 channels. Maybe this is just an error in their interface and they always have 'All 6 Channels' for all surround streams. Or, maybe they automatically upmix to 6 channels or add a silent Lfe (low frequency effects or subwoofer) channel. In my opinion, that's not a good thing to do because you are just increasing the file size with dummy data. I decided to try extracting a single track using the 'Direct Stream Demux' method. This will copy the audio stream directly without decoding so the output is exactly the same as the source. DTS audio is saved to a *.dts file. I can open it with foobar2000 and check the number of channels.
 As it turns out, the audio stream does have 6 channels. So I don't know why it was listed as DTS (48kHz 5CH). The DVD sleeve says it includes DTS 5.1, so I'll just assume the audio stream list is inaccurate. After determining the correct settings, I went back and selected all my chapters/tracks and set it to FLAC with the sample rate set to 'Same as input', channels to 'All 6 Channels' (afterall, the main reason for ripping this is to get the surround tracks) and the 'Bits per sample' to 16 bits. You can change these settings to downmix to stereo or upsample to 24-bit, but I want to keep it as close to the source to avoid adding any distortion. Note that by encoding to FLAC from DTS, I will end up with a larger file size because I will be going from a lossy compressed format to a lossless compressed format, which is always larger. Normally I wouldn't want to do this, but since the DTS format doesn't support metadata tagging, I am going to use FLAC. Using another lossy format like 5.1 OGG, would potentially add more distortion by putting the audio through another compression stage. Since storage space is pretty cheap, I'm going to go with the larger file size. Picking 'Next' takes me to the next step which lets me target the location of my output, save each chapter as a separate file and tag the files with artist and album names.
 The next step will take you to the final screen where you can start extracting the audio:
 Now I can add these tracks to my music library. That's it. Let me know if you have any questions or if you've found a better method.
